
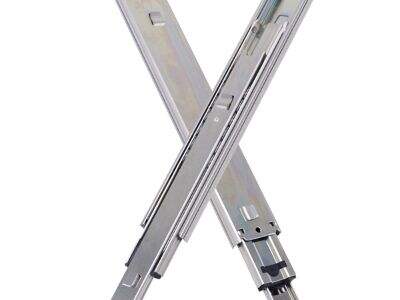
Taking away undermount drawer slides might appear to be a knotty task, but actually can be fairly straightforward. HVPAL knows that there are times when you have to change or fix them for your drawer glides. Learning how to take them out and put them back will ensure you don’t damage your drawers, and it will speed up the process for you. Here's a simple formula to make it easy for you.
Most Efficient Methods of Removing Undermount Drawer Slides
To begin with, there are a couple of critical techniques you need to be aware of when learning how to remove undermount drawer slides. First, have the proper instruments on hand. Most of the time you’ll only require a screwdriver, though perhaps also a pry bar. Start by removing everything from the drawer. The result is a lighter and more manageable mix. Then, find a disconnect mechanism on the slides. A release lever or button is included on many undermount slides. Push or pull this in order to disengage the drawer from the slides. If you don’t see a release mechanism, examine the sides of the slides for screws. You'll want to unscrew these screws with the precision screwdriver.
With the screws out, carefully lift the drawer directly upward. It should pull off the undermount slides easily. If it doesn’t slide, check one more time for hidden screws or levers that might be anchoring it in place. A little wiggling can help sometimes, but be careful not to force it. — too much pressure could aggravate the slides or the drawer. Take out the drawer and check the slides to see if they are worn or damaged. If you intend to replace them, make note of the type and size of bulb you need. HVPAL has different slides available to guarantee you find the best match for your needs.
How to Remove Undermount Drawer Slides Efficiently for Replacement?
When it’s time to remove undermount drawer slides for a new install or regular maintenance, a systematic approach is important. Once you are lining the drawer removed, it’s time to clean up the slides. Study the bottom of cabinet where you find the tracks. The majority of undermount slides are screw mounted. Unscrew these screws using your screwdriver very carefully. Store them inside a safe place, so you don’t lose it.
Unscrew the slides and then carefully pull them out or push them down to remove them from the cabinet. If they are getting hung up, look for other screws or clasps you may have missed. Sometimes slides are a little hard to on and off if they’ve been on for a while with dirt or rust. Sometimes a squirt of penetrating oil is helpful in freeing them up a bit. But be cautious, because don’t overuse it or it will make a mess.
After I got the slides out and attached the other surfaces, I washed off wherever they were stuck onto. If not cleaned up, dust and debris will interfere with the fresh new slides. Once everything is cleaned, you’re ready to install the new undermount types of drawer slides. HVPAL also includes instructions with their products so that you can install your new slides without a headache. Don’t rush Remember, it’s about taking your time. Rushing can lead to errors and you’d have to either do the work over.
By following these instructions at least you know how to remove undermount drawer slides and get yourself ready for a new one without any hassle. This knowledge can save you some time and energy whether you’re replacing or repairing your drawers. And don’t forget, HVPAL is there for you if you ever have questions or need support.
Where to Get trustworthy Guides on Removing Undermount Drawer Slide?
When you’re removing undermount drawer slides, you’ll want good guides that can assist. One of your best bets is to check online. Sites like HVPAL give step by step instructions that are simple to read. You can also see videos on sites like You Tube. These are often videos of actual people doing the work. You can now watch how to remove the slides and learn helpful hints that will make it easier.
Another good source is books on home repair. Most libraries and bookshops have shelves full of DIY books. Find books that feature furniture repair or home repair. These books sometimes include pictures and explanations to let you know how to get your slides out.
You could also turn to people you know for help. If you know friends or family members who have done furniture work, ask them. They may even teach you how to do it. As a reminder, it's always useful to get advice from someone who has been there before.
Lastly, if you belong to any online forums or social media groups about home improvement, you can tap into the group chat and ask members for their insights. There are plenty of people willing to share what they know. Just make sure you vet the advice as coming from someone who seems to know. HVPAL is there to assist if you have any questions or require further information on removing full extend drawer slides.
Undermount Drawer Slide Removal for Wholesale Buyers: What to Look Out For?
If you are a wholesale buyer wanting to learn how to replace undermount drawer slides there are some things to keep in mind. First, it's helpful to know why you would want to get rid of these slides. And often, drawers don’t slide all the way in or out quite right. Occasionally you might want to replace the slides with better ones. Learning how to take them off correctly can save you time and ensure your products stay in great shape.
If you’re taking out undermount drawer slides, it’s good to have the proper tools. You’ll need a screwdriver and pliers, perhaps even a utility knife. These are the tools for getting screws out and dealing with any clips that might be holding the slides in place. Before you get started, it’s a good idea to determine how the slides are connected. Some may require you to unlock the arms first. Knowing this will allow you to prevent damage to the slides or the drawer.
You also need to work with precision. No need to rush, that can cause trouble. And for wholesale buyers, maintaining slides is important to keep customers happy. If you snap any while trying to take them out, you could be in the market for a new set, and they aren’t cheap.
And be sure to keep everything neat. As you remove the slides, drop the screws and parts into a small container. That way you won’t lose anything and it will be less hassle to add new fully extending drawer slides later on. HVPAL obviously you should always keep your work area clean, but in these cases where your working with small parts.
How to Fix Common Issues With Removing Undermount Drawer Slides?
Every once in a while you can encounter difficulties when removing undermount drawer slides. But don’t worry. Finding the cause of such troubles is not as difficult as it seems. This is a notorious bummer as it leaves you staring into the white winter, trying to figure out why they just won’t work properly. If this occurs, PAUSE AND LOOK TO SEE if you left any screws or clips hiding somewhere. Every now and then, a slide may stick if another thing is still holding it, keep the above tips in mind while removing them. Peek inside and ensure that you have everything out before you pull the drawer.
Another problem you could be running into is that the slides are damaged or rusted. If you can see that the slides are worn, it may be more difficult to remove them. Here, apply a little lubricant, such as WD-40, to help loosen them. Lightly mist the slides and give it a few minutes. This will help make it easier to take the slides out without having them snap.
If the slides jam or do not drop out freely, you may have dirt and other debris trapped inside. A fast wipe down with a cloth can go a long way. Just be sure to wipe down the sides and where they slide into. This will clear out whatever is bugging it.
Lastly, if you’ve tried all these steps and still can’t get the drawer out, it may be time to look for help. You could ask someone who knows about furniture repair, or advice from HVPAL. Remember, there’s nothing wrong with asking for help if you need it. By taking your time and working through it bit by bit, you’ll make it easier for yourself to ultimately enjoy a much smoother process.
Table of Contents
- Most Efficient Methods of Removing Undermount Drawer Slides
- How to Remove Undermount Drawer Slides Efficiently for Replacement?
- Where to Get trustworthy Guides on Removing Undermount Drawer Slide?
- Undermount Drawer Slide Removal for Wholesale Buyers: What to Look Out For?
- How to Fix Common Issues With Removing Undermount Drawer Slides?
